August 17, 2026
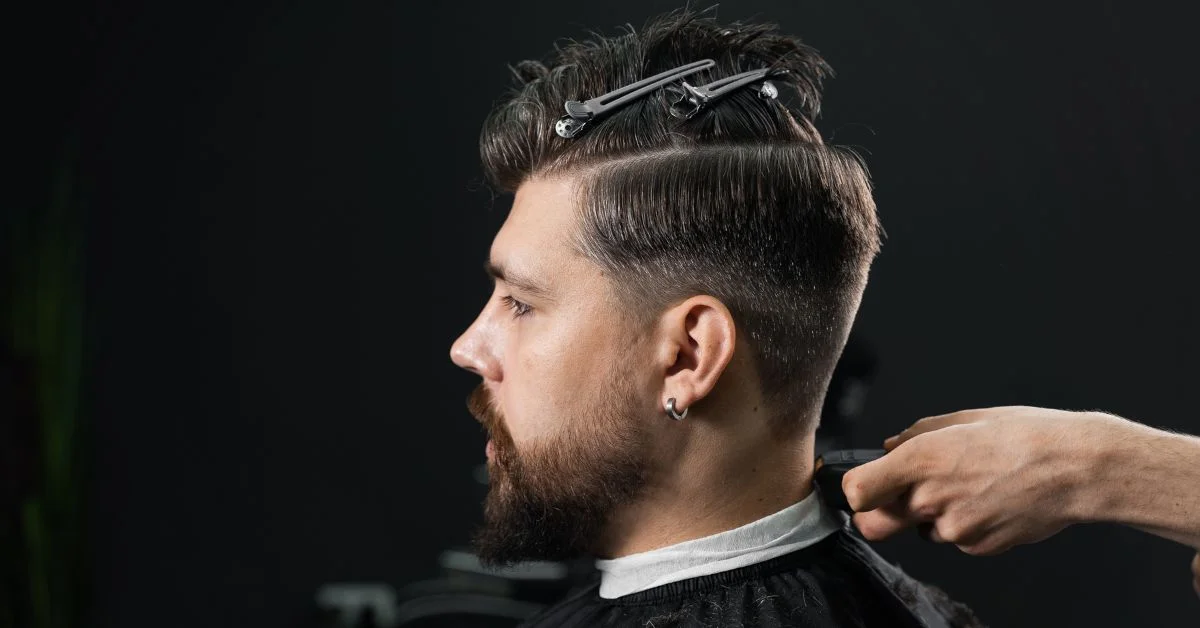
A fade can look simple from a distance, but one uneven guideline or the wrong cutting length can leave a visible dark line around the head. How to do a fade haircut comes down to controlling the fade height, clipper settings, guidelines and blend before removing too much hair.
To do a fade haircut, choose the fade height and shortest length, create a consistent first guideline, then work upwards with progressively longer clipper settings. Use controlled lever adjustments and light outward strokes to soften visible lines, connect the upper fade to the longer hair and check the blend from every angle before detailing the edges..
At HQ Barbershop in Dallas, our Clipper Cut service includes fade clipper cuts and short styles tailored around hair type, face shape and the finish a client wants.
In this blog, we’ll explain how to build a fade step by step, use clipper guards and lever positions, remove stubborn lines, blend the sides into the top and avoid the mistakes that make a fade look uneven.
What Is a Fade Haircut?

A fade haircut gradually changes from shorter hair around the lower sides and back into longer hair higher on the head. Clippers, guards, adjustable blade settings and blending techniques create the transition so one length flows into the next without obvious unintended lines.
Simply cutting the sides short does not automatically create a fade. The haircut needs several controlled lengths that connect visually.
How Does a Fade Haircut Work?
Think of the side of the head as several narrow zones. The lowest zone carries the shortest length. The area above keeps slightly more hair. Each section becomes progressively longer until the fade reaches the upper sides and connects with the hairstyle on top.
The difficult part is hiding the boundaries between those zones.
What Makes a Clean Fade?
A clean fade should show a controlled transition without accidental steps, harsh lines or one side sitting noticeably higher than the other. The upper transition matters too. A fade beneath a short textured crop needs a different amount of side weight from one that connects into a longer side part.
Smooth does not mean removing every dark area. Hair density can naturally make one section look heavier than another.
How to Do a Fade Haircut in 10 Steps
The clearest way to understand how to do a fade haircut is to follow one sequence and avoid changing the plan halfway through.
Fade Haircut Process at a Glance
- Choose the fade height. Decide between a low, mid or high fade.
- Choose the shortest length. Decide whether visible hair remains at the base or the fade goes very close.
- Prepare the hair. Comb it into its natural direction and protect longer top sections.
- Remove excess bulk. Reduce heavy side growth before detailed blending.
- Create the first guideline. Keep the height consistent around the head.
- Create the next transition zone. Use a longer setting above the first.
- Blend the lower line. Use intermediate cutting lengths and lever adjustments.
- Blend the upper fade. Move into longer settings without pushing the fade higher.
- Connect the fade to the top. Use longer guards, clipper-over-comb or scissors where needed.
- Check and detail. Compare both sides, inspect the back and finish the perimeter.
Step 1: Choose the Fade Height
Set the height before using the shortest setting. A low fade keeps the transition close to the ears and neckline. A mid fade moves through the middle of the sides. A high fade removes more upper-side weight and creates stronger contrast.
Changing your mind halfway through usually moves the fade higher.
Step 2: Choose the Shortest Length
Not every fade needs to reach the skin.
You can leave visible hair at the base or choose a much closer finish. The shorter the starting point, the more length difference you need to connect above it.
Step 3: Prepare the Hair
Comb the hair into its natural growth direction.
If the top needs to remain longer, keep it away from the fade area so you do not accidentally remove useful length.
Step 4: Remove Excess Bulk
Heavy growth can hide the guidelines.
Use a conservative longer setting to reduce obvious bulk before creating detailed transition zones.
Step 5: Create the First Guideline
Place the first guideline at your chosen fade height.
Keep it balanced above both ears and around the back. If this foundation starts uneven, every section above it becomes harder to control.
Step 6: Create the Next Transition Zone
Use a longer cutting setting above the first section.
Keep this band relatively controlled. If it becomes too wide, you may run out of space before reaching the longer hair above.
Step 7: Blend the First Line
Return to the boundary between the first two lengths.
Use a cutting setting between them. The clipper lever or an intermediate guard can help you reduce the difference gradually.
Use light strokes rather than digging deeply into the longer section.
Step 8: Blend the Upper Fade
Move towards longer settings.
At this stage, stop cutting areas that already look balanced. Focus on the dark spots that still need attention.
Step 9: Connect the Fade to the Top
The upper transition may need a larger guard, clipper-over-comb or scissors.
Preserve enough weight for the hairstyle on top.
Step 10: Cross-Check and Detail
Brush everything clean.
Compare the height above both ears, inspect the back and check the haircut from several angles before making final corrections.
How Do Clipper Guards Work for a Fade Haircut?

There is no universal fade guard sequence that works for every person.
Hair density, starting length, clipper system and desired fade all affect which settings make sense.
Shorter Guards at the Base, Longer Guards Above
The basic principle is straightforward. Shorter settings create the lower fade. Progressively longer settings connect that section towards the upper sides.
HQ’s dedicated fade-guard guide also explains that several guard lengths usually work together rather than one number creating the entire fade.
Why a Line Appears Between Guards
Imagine one area cut much shorter than the section directly above it. Your eye sees the sudden change in length. A setting between those two lengths helps soften the boundary.
Do You Need Half Guards?
Intermediate guards can help, but adjustable blade positions can also create useful lengths between major settings.
The principle matters more than memorising one guard formula. For a deeper breakdown of guard choices, read Best Clipper Guard Length for Fade.
What Do Open and Closed Lever Mean on Clippers?
An adjustable clipper lever changes the blade position and therefore changes the cutting length.
Closed Lever
A closed lever generally cuts shorter. That shorter setting can help near the lower part of a transition.
Open Lever
Opening the lever generally leaves slightly more hair. This creates another cutting length without immediately changing guards.
Intermediate Lever Positions
You do not need to choose only fully open or fully closed. A stubborn line may respond better to a position between those settings. Small adjustments give you more control.
Exact blade lengths differ between clipper models, so treat lever positions as a blending tool rather than one universal measurement.
How to Create and Remove Fade Guidelines
Guidelines organise the fade while you work. They are temporary boundaries, not lines that should remain visible at the end.
What Is a Fade Guideline?
A fade guideline is a temporary visible boundary between two cutting lengths. It helps organise the haircut into controlled zones before those boundaries are blended into a gradual transition.
Keep the First Guideline Consistent
Check its height above both ears. Then inspect the back before moving to the next stage.
A crooked first line usually creates more work later.
Avoid Making Guidelines Too Wide
Every transition needs space.
If the first zone covers too much of the side, later cutting lengths have less room before reaching the top.
How Do You Remove a Line From a Fade?
Identify the shorter length below the line and the longer length above it, then use a cutting setting between them. Work lightly at the boundary with small lever adjustments and an outward flicking motion rather than repeatedly cutting into the longer section above.
Work on the Line, Not the Whole Fade
This is one of the most useful fade habits. If one temple already looks balanced, leave it alone.
Repeatedly cutting an area that no longer needs work can move the fade higher and create a new problem.
Low Fade vs Mid Fade vs High Fade
The main difference between these fades is where the transition sits and how much upper-side weight remains.
| Feature | Low Fade | Mid Fade | High Fade |
| Fade position | Lower sides | Middle sides | Higher sides |
| Contrast | Subtle | Moderate | Strong |
| Side weight | More retained | Balanced | Less retained |
| Overall effect | Softer | Versatile | More dramatic |
Low Fade
A low fade keeps the transition near the perimeter. More hair remains through the upper sides, which can create a softer connection to longer hairstyles.
Mid Fade
A mid fade starts higher and creates more noticeable contrast. It sits between the subtle effect of a low fade and the stronger side reduction of a high fade.
High Fade
A high fade moves the short transition much further up the side. This creates stronger separation between the sides and the hairstyle above.
Which Fade Should You Choose?
Consider top length, hair density, desired scalp visibility and how dramatic you want the contrast to feel.
For more fade variations and short clipper-led styles, read Types of Clipper Cuts for Men. HQ’s current guide includes low, mid and high fade variations alongside other clipper styles.
Skin Fade vs Regular Fade Haircut
Both use the same gradual blending principle. The lowest cutting length creates the difference.
What Is a Skin Fade?
A skin fade takes the lowest section extremely close before moving progressively into longer hair. That close base creates strong contrast.
What Is a Regular Fade?
A regular fade leaves visible hair at the shortest point. The lower transition can therefore appear softer.
Which One Needs More Visual Upkeep?
Very close fades show changes at the base quickly because even a small amount of new growth changes the contrast. That does not mean every skin fade needs one fixed maintenance schedule. Hair growth and the level of sharpness you prefer matter more.
How to Blend a Fade Into the Hair on Top
A smooth lower fade can still look unfinished if it reaches a heavy block of hair near the top.
Clipper-Over-Comb
Place the comb through the heavier upper section and remove only the hair projecting beyond it. This gives more control than pushing a fixed guard through a section that needs shape rather than one uniform length.
Scissor-Over-Comb
Scissors can create a softer connection through longer sections. This becomes useful when the top needs movement or extra weight.
Clippers vs Scissors
Clippers handle short controlled lengths well. Scissors provide more flexibility through longer hair and texture. Many men’s haircuts use both methods.
For a fuller explanation, read Difference Between Clipper and Scissor Cut. HQ’s current guide specifically distinguishes short clipper blending from the longer shape and texture control offered by scissors.
If the haircut needs substantial shaping through the longer top, HQ’s Men’s Haircut service covers fades alongside classic and modern men’s styles.
How to Fade Different Hair Types
The same guard number can look different depending on texture and density.
Straight Hair
Straight hair can expose transitions clearly. That makes a good blend easy to see, but it also makes an unwanted line harder to hide.
Wavy or Curly Hair
Waves and curls change as the hair gets shorter. A transition can therefore appear lighter or darker because the texture changes as well as the length.
Judge the fade visually, not only by guard number.
Thick or Coarse Hair
Dense growth often creates darker patches. Do not assume every dark spot automatically needs to become shorter. Check whether you are seeing excess length or simply greater density.
Fine Hair
Fine hair may reveal more scalp at short lengths. Choose fade height and base length with that visibility in mind rather than copying the exact same fade used on very dense hair.
Common Fade Haircut Mistakes and How to Fix Them
Most fade problems start before the final blend.
Starting the Fade Too High
A high first guideline leaves less room for the transition above. Set the planned height before using the shortest setting.
Creating Uneven Guidelines
Check the first line before creating the second. Fixing one uneven guideline takes much less work than fixing an entire uneven fade.
Using a Shorter Guard on Every Dark Spot
Shorter is not always the answer. Use the length that falls between the hair above and below the visible line.
Pressing the Clippers Too Hard
Extra pressure can make the cutting movement less controlled. Keep the clipper steady and let the blade setting remove the hair.
Pushing the Fade Higher While Fixing It
This is the classic mistake. You see a line, cut too far above it and create another line.
Stop and identify the exact transition that needs work before taking more hair away.
Can You Do a Fade Haircut at Home?
Yes, but a fade requires more control than a simple one-length clipper cut.
When a DIY Fade May Work
A conservative fade gives you more room for correction. Use clippers you understand, keep the first guideline lower and begin with more length rather than immediately going extremely short.
Why the Back Is Difficult
You cannot naturally see the back of your head. Multiple mirrors help, but maintaining the same guideline height while working backwards takes practice.
Start Longer if You Are Unsure
You can always remove more hair. You cannot add it back during the haircut. That simple rule prevents a lot of fade problems.
When Professional Cutting Makes Sense
A skin fade, major style change, uneven previous haircut or fade that needs to connect precisely into a longer top may require more control than basic home maintenance.
Fade Haircuts at HQ Barbershop in Dallas
At HQ Barbershop on Oak Lawn Avenue in Dallas, we create fades around the complete haircut rather than treating the service as a fixed guard sequence. Our Clipper Cut service includes fade clipper cuts, short clipper styles and customised work based on hair type, face shape and style preference.
Choosing the Fade Height
We can discuss whether you want the transition low, through the middle of the sides or higher for stronger contrast.
Connecting the Fade to the Top
Top length changes the upper blend. A fade beneath a short crop needs a different connection from a fade paired with longer styled hair.
Using the Right Technique for the Finished Style
Some fades rely mainly on clippers. Others need scissor work through the upper sides or top.
The finished haircut should decide the tools, not the other way around.
Frequently Asked Questions About How to Do a Fade Haircut
What Guards Do You Need for a Fade Haircut?
There is no universal guard sequence for every fade. The right settings depend on the shortest base length, clipper system, hair density and upper transition. In general, the cutting lengths become progressively longer as you move higher on the head.
What Does Open and Closed Lever Mean on Clippers?
A clipper lever adjusts the blade position. A closed lever generally cuts shorter, while an open lever generally leaves more hair. Intermediate positions give extra control between those settings. Exact cutting lengths can vary between clipper models.
How Do You Remove a Line From a Fade?
Use a cutting length between the shorter hair below the line and longer hair above it. Work directly at the boundary with gradual lever changes and light outward strokes. Avoid repeatedly cutting the section above the line because that can push the entire fade higher.
What Is the Easiest Fade for a Beginner?
A conservative fade that leaves more hair at the base generally gives a beginner more room for correction than a very close skin fade. Keep the first guideline controlled, start with longer settings and shorten gradually.
Can You Do a Skin Fade at Home?
Yes, but a skin fade requires careful guideline placement, very short base work, controlled transitions and enough visibility to inspect the back. If you are new to fading, starting with more length gives you more room to correct a mistake.
Get the Fade That Matches Your Hair and Style
How to do a fade haircut comes down to a series of controlled decisions. Set the fade height, choose the shortest length, create balanced guidelines and move through progressively longer cutting settings without pushing the haircut higher than intended.
Guard numbers matter, but they are only part of the process. Hair density, texture, lever control, clipper movement and the hairstyle on top all affect the final blend.
Start conservatively. Brush the hair often. Fix the specific dark area instead of repeatedly cutting everything around it.
HQ Barbershop helps us create fades around our hair type, preferred contrast and finished hairstyle. Book our Clipper Cut for professional fade and clipper work in Dallas. If your finished haircut needs more detailed shaping through the longer top, our Men’s Haircut provides the broader haircut option. You can also get directions to HQ Barbershop in Oak Lawn and visit us for a fade shaped around your hair type, preferred contrast and overall style.