August 23, 2026
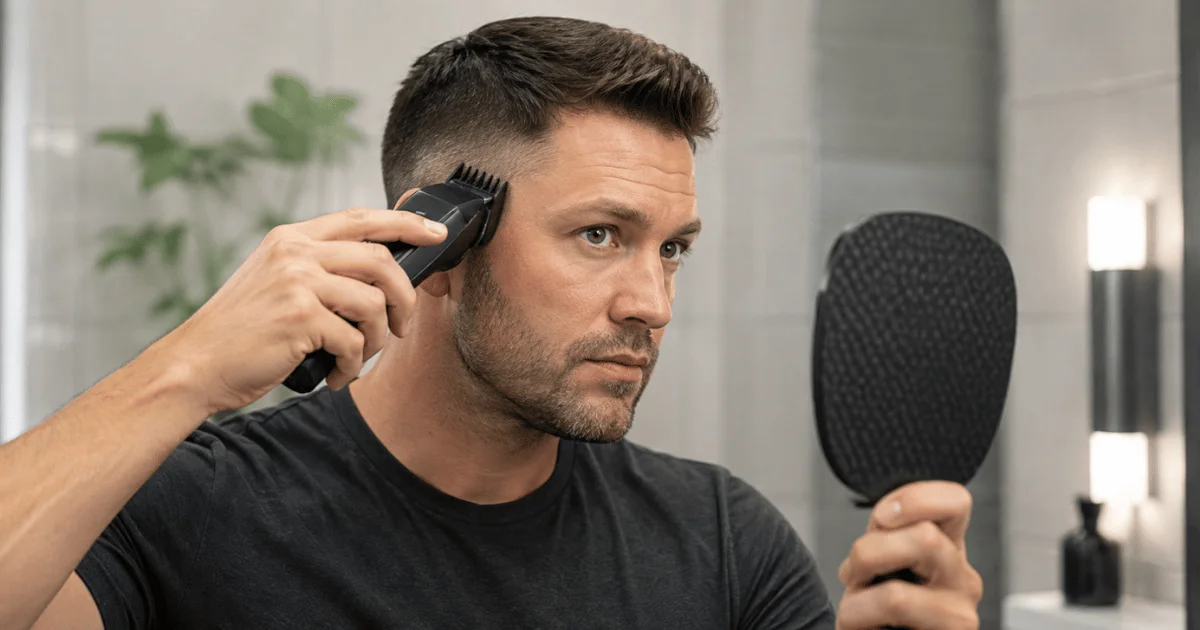
When cutting your own hair, the right way to hold clippers is to tuck your thumb underneath the body of the clipper while your other four fingers rest on top. This underhand grip keeps your hand away from your line of sight in the mirror, so you can clearly track where the blade is and cut more precisely.
Nail the grip and everything else gets easier. The sides, the back, even a basic fade all come down to how steady your hand is.
At HQ Barbershop in Oak Lawn, Dallas, our barbers hold clippers all day long, so we know exactly where beginners slip up. Here’s how to hold yours the right way, step by step, plus the mistakes to skip.
Quick grip checklist
Before the details, here’s the whole thing in five lines. Get these right and the rest follows.
- Grip: relaxed, like holding a TV remote, never white-knuckle
- Angle: blade flat, 90 degrees for even length, tilt slightly on curves
- Pressure: light, let the clippers glide, never force them
- Direction: move against the way your hair grows
- Motion: smooth wrist strokes, not stiff arm movements
The right way to hold your clippers
Start with your grip. Hold the clippers like you’d hold a TV remote, firm enough to control, loose enough that your hand stays relaxed. A tight, white-knuckle grip is the fastest way to a shaky cut. Rest the clippers in your palm, fingers wrapped around the body and your thumb along the side for balance. Keep the power button easy to reach, but don’t strangle the tool.
Your grip should feel comfortable after ten seconds. If your hand aches, you’re squeezing too hard. Loosen up and let the clippers do the work, because the motor cuts the hair, not your grip strength.
Blade angle and pressure
Angle is where most home cuts go wrong. Keep the blade flat against your head so the guard sits fully on your scalp. That flat contact is what gives you an even length.
For a straight, uniform cut, hold the blade at 90 degrees to your skin. When you reach curved areas like the back of the head, tilt the blade slightly, around 5 to 15 degrees, so it follows the shape instead of digging in. Now the pressure. Use a light touch and never force the clippers. Let them glide. If you press hard, you’ll get harsh lines and uneven patches. Slow, gentle passes beat fast, heavy ones every time.
How to move the clippers
Direction matters as much as grip. For an even cut, move the clippers against the direction your hair grows. So if your hair grows down, run the clippers upward. Use smooth, controlled strokes and let your wrist do the moving, not your whole arm. Stiff arm movements create lines. A natural wrist motion keeps the finish clean.
Go slow and overlap each pass slightly so you don’t miss a strip. After a few strokes, brush off the loose hair and check your progress in the mirror. Then keep going.
Holding the clippers for the back of your head
The back is the hardest part, because you can’t see it directly. This is where a lot of self-cuts fall apart. First, set up two mirrors. Stand with your back to a wall mirror and hold a smaller mirror in your free hand so you can see the reflection. It feels backward at first, so move slowly until your hand learns the angle.
Keep the same relaxed grip, but expect to rotate your wrist more to reach the lower back and neckline. Work from the bottom up, in short strokes, and pause often to check both sides match.
For the neckline, flip the clippers so the blade faces you and use the edge to clean the bottom line. Take your time here. A rushed neckline shows more than any other spot.
What about left-handed cutting?
Good news: the grip is the same. Left-handed users hold the clippers exactly the way right-handers do, just mirrored. Your dominant hand controls the clippers while the other holds the mirror or guides your ear out of the way.
If you’re cutting both sides, you may find it easier to switch hands rather than twist your wrist across your head. That takes practice, so start with your dominant hand and build from there.
Common mistakes to avoid
A few slip-ups show up again and again with first-timers. Skip these and you’re most of the way there.
- Gripping too tight, which tires your hand and makes the cut shaky.
- Pressing too hard instead of letting the clippers glide.
- Tilting the blade off your scalp, which leaves uneven length.
- Cutting wet hair, since it dries shorter than it looks and throws off your length.
- Rushing the back and neckline, the two spots that give away a home cut.
Worth knowing: always cut dry, clean hair. Wet hair stretches, so you’ll take off more than you planned once it dries.
A quick self-cut walkthrough
Once your grip feels steady, here’s the basic order for a simple cut. For guard choices, our guide on the best clipper guard length breaks down the numbers.
First, pick your guard and start on the sides. Run the clippers upward from the bottom of the sides toward the top, keeping the blade flat.
Next, do the back the same way, using your two-mirror setup and working bottom to top. Then move to the top of your head, cutting from front to back.
For a faded look, drop down one guard size and run only the lower half of the sides and back, blending as you go. Our fade haircut guide covers that blend in detail, and it’s the trickiest part to pull off alone.
Finish by cleaning the sideburns, around the ears, and the neckline with no guard, using the blade edge for sharp lines.
When to leave it to a barber
Self-cutting works fine for a simple buzz or a quick trim between visits. But a clean fade, a detailed blend, or a sharp neckline is genuinely hard to do on yourself, no matter how good your grip is.
If you want a look that holds up, that’s what we’re here for. Our barbers at HQ Barbershop shape everything from a basic clipper cut to a full skin fade, and we’ll get the back and blend right so you don’t have to fight two mirrors. See what a proper clipper cut in Dallas looks like when a pro handles it.
Frequently asked questions
Q1. How do you hold clippers for a self haircut?
Answer: Hold them in a relaxed grip with your fingers around the body and your thumb on the side for balance. Keep the blade flat against your head, use light pressure, and move your wrist in smooth strokes. A loose, steady hand gives the cleanest result.
Q2. What angle should you hold clippers at?
Answer: For a straight, even cut, hold the blade at 90 degrees to your scalp so the guard sits flat. On curved areas like the back of your head, tilt it slightly, about 5 to 15 degrees, so the clippers follow the shape and avoid harsh lines.
Q3. Why do my hands hurt after cutting my own hair?
Answer: You’re gripping too tight or pressing too hard. The motor does the cutting, not your hand, so a firm but relaxed hold is all you need. Loosen your grip, use lighter pressure, and let your wrist move naturally to stop the strain.
Q4. How do you hold clippers to cut the back of your head?
Answer: Use two mirrors, a wall mirror behind you and a handheld one in front, so you can see the back. Keep your usual grip but rotate your wrist more to reach the lower area, and work in short strokes from the bottom up.
Q5. Is holding clippers different for left-handed people?
Answer: No, the technique is identical, just mirrored. Your dominant hand controls the clippers while the other holds the mirror or moves your ear aside. Some people switch hands between the two sides, though that takes a little practice to feel natural.
Final word
Holding your clippers the right way is 90 percent of a good home haircut. Keep the grip relaxed, the blade flat, and the pressure light, and your sides and top will come out cleaner than you’d expect on the first try.
The back and the fade are the real test, and those take practice, so go slow and don’t chase perfection early. Learning how to hold your clippers when cutting your own hair is a skill, and it gets better every time you pick them up.
When you want a fade that actually looks sharp, skip the two-mirror struggle and let a barber handle it. Book your men’s haircut in Dallas at HQ Barbershop and leave the tricky work to us.